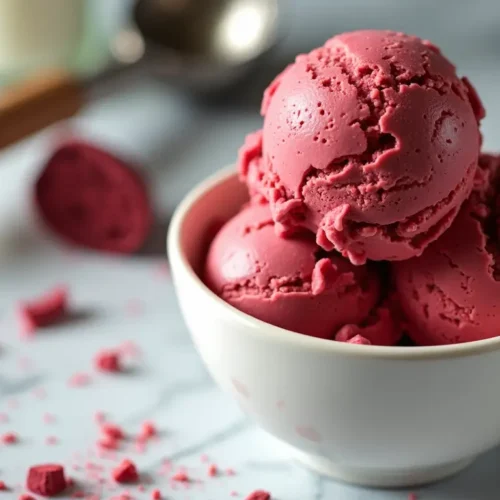
Red Velvet Ice Cream
Indulge in the rich, decadent flavors of Red Velvet Ice Cream—a no-churn dessert that’s as easy to make as it is delicious! This creamy, velvety ice cream combines the classic taste of red velvet cake with a smooth, frozen treat. Made with cream cheese, heavy cream, and a hint of cocoa, this recipe is perfect for red velvet lovers who want a cool, refreshing twist on their favorite dessert.
Ingredients
- This red velvet ice cream recipe has an influence on two main parts – the ice cream base and a cream cheese swirl. The ice cream base begins with 2 cups heavy cream and 1 cup whole milk. These dairy items create the base to make our ice cream creamy.
- We mix in 3/4 cup granulated sugar to balance the flavors and help the ice cream freeze right. The recipe needs 2 tablespoons cocoa powder to add that hint of chocolate that makes red velvet treats unique.
- The classic red velvet color comes from 1 tablespoon liquid red food coloring. You’ll also need 1 teaspoon vanilla extract and 1/4 teaspoon kosher salt to boost the overall taste.
- Your cream cheese swirl requires 4 ounces of cream cheese at room temperature 1 cup of powdered sugar, and 1 teaspoon of vanilla extract. You’ll also need 2 cups of red velvet cake pieces – you can chop up homemade or store-bought cake into small even pieces.
- Quality Tip: Heavy cream and whole milk together create the creamiest texture. The butterfat in these ingredients gives your ice cream a smooth consistency even after it freezes.
- Remember, the cream cheese should be at room temperature when you start. This step helps you avoid lumps and ensures a smooth swirl throughout the ice cream.
Instructions
- Begin your red velvet ice cream by combining cream cheese, sweetened condensed milk, and vanilla in a big bowl. Mix these components until they form a smooth blend.
Preparation:
- Put the cream cheese mixture in a powerful blender with heavy cream, milk, sugar, and cocoa powder. Blend until it becomes smooth.
- Transfer the mixture to a large bowl and chill it for 2-3 hours or leave it overnight.
- Once chilled, create your cream cheese frosting. Beat cream cheese, butter, and vanilla together. add powdered sugar until the mixture turns fluffy.
Cooking:
- The ice cream maker churns the cold mixture. Follow the maker’s guidelines, which need 30-45 minutes. Scrape the sides with a metal spoon or rubber spatula while churning to freeze .
- Build your ice cream in these steps:
- Put one-third of the churned ice cream in a freezer-safe container
- Add cream cheese frosting in small amounts on top
- Make light swirls with a knife
- Do this two more times
- Cover the container with plastic wrap. Allow the ice cream to harden in the freezer for about 6-8 hours. You can keep this ice cream in the freezer for up to a month without losing quality.
- Temperature Tip: To get a silky smooth texture, heat the mixture to 170°F. You’ll know it’s done when a line drawn with your finger on the back of a spoon stays put.
Notes
Homemade red velvet ice cream keeps well for about two weeks. To store it longer, put it in an airtight container or wrap it with plastic wrap and aluminum foil.
Temperature Tips: Let the ice cream sit at room temperature for 20 minutes to make it easy to scoop. In hot weather, soften it in the fridge instead – this takes more time.
Here are some clever ingredient substitutions that work well:
- Combine 3/4 cup milk with 3/4 cup plain yogurt or sour cream to replace buttermilk
- Natural cocoa powder results in a lighter red hue compared to Dutch-processed cocoa
- Natural food colorings serve as good substitutes for artificial dyes