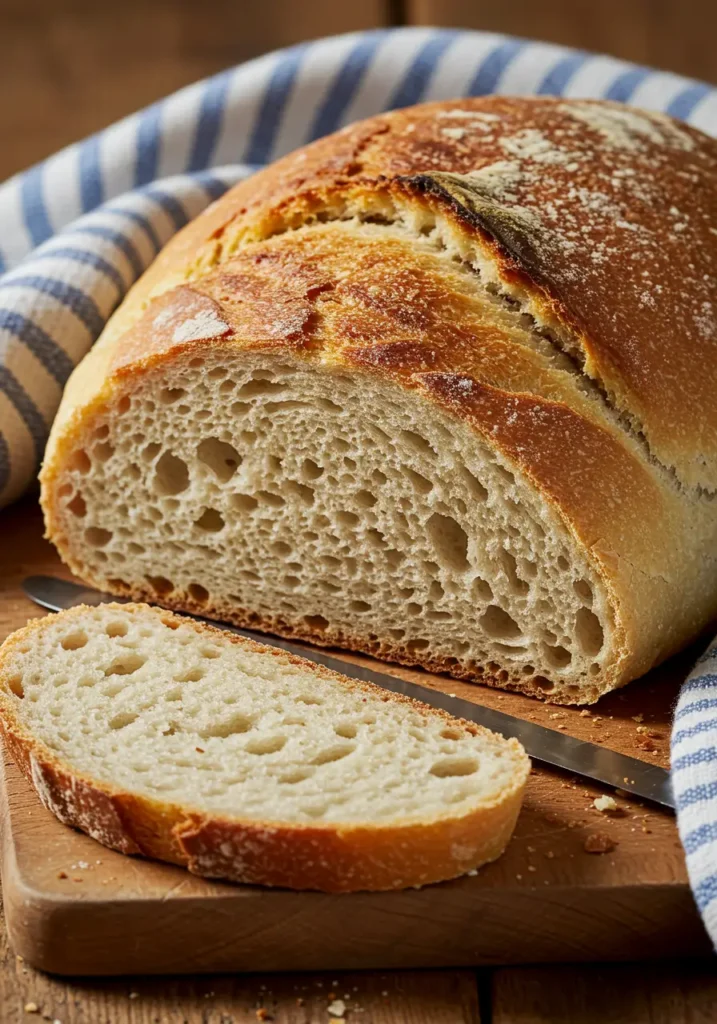
Easy Homemade Bread
Most people never attempt to make homemade bread because they believe it requires hours of kneading and waiting.
The truth is you don’t need to spend half your day in the kitchen to enjoy fresh-baked bread’s aroma throughout your home. This foolproof recipe will transform your perspective on breadmaking, whether you’re new to baking or have tried unsuccessfully before.
Over the last several years, I’ve refined this simple bread recipe by eliminating the complexity that discourages many home bakers. You’ll need just 60 minutes and common pantry ingredients to create a warm, crusty loaf that matches any bakery’s quality. Let me show you this straightforward method that will make you wonder why you waited so long to try it.
What Makes This Recipe So Good?
I can’t wait to tell you what makes this homemade bread recipe different from the rest. You probably have all the ingredients sitting in your pantry right now. The recipe makes two big loaves, which works great for families or meal prep.
This recipe’s reliability and versatility make it special. You’ll get bread with a beautiful golden crust and chewy texture that’s not too dense. The best part is you don’t need fancy equipment – a large bowl works fine though I prefer my KitchenAid for a smoother loaf.
Here’s what makes this recipe truly special:
- Perfect for both novice and experienced bakers
- Tastes way better than store-bought French bread
- Stays fresh longer with proper storage
- Makes outstanding French toast
The recipe gives you lots of options to prepare it. Your bread will turn out super smooth with a stand mixer, and baking on the Convection setting at 375°F for 18-20 minutes gives great results every time.
The bread keeps its quality really well. Just cut it into one-inch thick pieces and pop it in a bread bag or ziplock container. You’ll have fresh-tasting bread all week long.
It’s worth mentioning that humid environments need a slight tweak. Just use less liquid to get that perfect texture. This small change helps the recipe work in any climate while keeping it foolproof.
What I Love About recipe:
This recipe has become my favorite way to make fresh bread at home. Its simple approach has transformed my entire perspective on baking.
The recipe’s forgiving nature makes it special. Without doubt, the bread turns out delicious even when my measurements aren’t exactly right. This quality makes it perfect to teach my children about baking.
Here’s what makes this recipe a staple in my kitchen:
- Ready in just an hour from start to finish
- Perfect for busy weekday baking
- Excellent for both sandwiches and toast
- Freezes beautifully for later use
- Adaptable for different occasions
Recipe Variations
Want to add some excitement to your simple bread recipe? I’ve found countless ways to customize this versatile homemade bread. At first, I started with basic variations and then explored more creative combinations.
You can customize this recipe by incorporating herbs and seasonings. Adding 4 cloves of minced garlic with 3 tablespoons of chopped rosemary creates a Mediterranean twist. These popular variations work well too:
- Fresh herbs (double the amount if using fresh instead of dried)
- Cheese variations (1/4 to 1/2 cup freshly grated Parmesan or cheddar)
- Dried fruits and nuts (raisins, cranberries, crystallized ginger)
- Spice blends (Italian herbs, vadouvan, or pumpkin pie spice)
Ingredient substitutions can help when you’re running low on certain items. Oil works instead of butter, and water can replace milk. To make whole wheat variations, white flour can be replaced with wheat flour – just use 24 oz instead of 28 oz, as wheat flour’s density differs.
Equipment
The right equipment can make the difference between success and frustration in my homemade bread recipe. Let me share the tools that help me get great results every time.
Essential Equipment:
- A reliable stand mixer with dough hook
- A sturdy Dutch oven for perfect crust formation
- Digital scale for precise measurements
- Instant-read thermometer
- Simple mixing bowls
- Bench scraper for handling dough
My digital scale is the life-blood of successful bread baking. Experience has taught me that weighing ingredients takes away the guesswork and will give a consistent result. The OXO Stainless Steel Food Scale is my go-to choice because it’s accurate and durable.
Temperature control is a vital part of bread making. We used an instant-read thermometer to check water temperature and monitor how the dough develops. This simple tool helps me get the perfect rise every time.
My stand mixer with a dough hook attachment handles mixing and kneading. You can knead by hand, but the stand mixer saves time and energy while giving me smooth dough consistently.
The bench scraper has turned into my most versatile tool. It helps me divide dough, clean my work surface, and create tension when I shape loaves. This cheap tool makes sticky dough much easier to handle.
Good storage matters just as much as baking equipment. I keep my fresh bread in a bread box that maintains the perfect balance between crustiness and moisture.
Here’s my advice if you’re starting to bake bread: start with the basics and build your collection over time. Professional bakers might use fancy equipment, but these simple tools will help you make delicious bread every time.
Ingredients
Let me share the exact ingredients you’ll need for this quick and delicious homemade bread recipe. My years of baking experience have taught me that precise measurements with the right ingredients make all the difference.
Here’s what you’ll need:
- 2 ¾ cups bread flour (or all-purpose flour)
- 2 tablespoons sugar
- 1 teaspoon salt
- 1 package (2½ teaspoons) instant dry yeast
- 1 cup very warm water (about 110°F)
- 5 tablespoons olive oil
Bread flour works best because of its higher protein content. This creates better gluten development and gives your bread that perfect chewy texture. You’ll need to proof active dry yeast first in warm water before mixing it with other ingredients if you’re not using instant yeast.
Your ingredients’ quality matters a lot. I’ve found through countless batches that fresh flour makes more flavorful bread. Your flour’s protein content plays a significant role – it helps create those lovely air pockets in your finished loaf.
A few key tips about ingredients:
- Water temperature should be around 110°F – too hot will kill the yeast, too cool won’t activate it properly
- Store-bought active dry yeast and instant yeast are both fine choices
- Table salt works perfectly – no need for fancy varieties
I keep my ingredients fresh by storing yeast in an airtight container in the refrigerator and flour in a cool, dry place. This simple homemade bread recipe shows you don’t need complicated ingredients to create bakery-worthy results.
Print
Easy Homemade Bread
- Total Time: 2 hours 30 minutes
- Yield: 4 1x
Description
This simple homemade bread recipe creates a soft, fluffy loaf with just a few pantry staples. Perfect for beginners.
Ingredients
- 2 ¾ cups bread flour (or all-purpose flour)
- 2 tablespoons tablespoons sugar
- 1 teaspoon salt
- 1 package (2½ teaspoons) : instant dry yeast
- 1 cup very warm water (about 110°F)
- 5 tablespoons olive oil
Instructions
- Step 1: Let's tuck into making this delicious homemade bread recipe. These steps will help you create perfect loaves every time.
Step 2: The process starts with combining all dry ingredients in a stand mixer bowl or large mixing bowl. Add oil and water (110°F) and mix everything for one minute until the dough becomes sticky. The dough might need more water if it feels too dry, so add it gradually.
Step 3: Mix the dough for another 5 minutes. The dough develops its structure during this time, so avoid adding extra flour. Proper gluten development is a vital part – you'll know it's ready when the dough becomes smooth and elastic.
Spray a clean surface with cooking spray. Place the dough on this surface and knead it briefly until smooth. Transfer the dough to a greased bowl right away and cover it with a clean towel. Let it rise in a warm place for 25 minutes.
Step 4: Shape the dough into loaves after it rises. Here are some proven tips for perfect shaping:
Tuck rough edges underneath to create a smooth top surfaceKeep enough space between loaves on the baking sheet
Create 3-4 diagonal slashes across the top, about ¼” deepStep 5: Heat the oven to 350°F while the shaped loaves complete their final rise.
Bake the bread for about 25 minutes until it develops a beautiful golden-brown crust. Rotate the loaves halfway through baking to ensure even browning.
Watch for these visual indicators throughout the process:
– Dough should feel sticky after initial mixing.– Surface should show bubble formations after rising.– Finished bread should display a golden-brown color.
Notes
- Warm Water: Ensure the water is not too hot; it can kill the yeast. Use water around 110°F (43°C).
- Flour: You can substitute half of the all-purpose flour with whole wheat flour for a heartier loaf.
- Storage: Store leftover bread in an airtight container at room temperature for up to 3 days or freeze for longer storage.
- Prep Time: 15 minutes
- Cook Time: 25 minutes
Nutrition
- Calories: 120
FAQs
The secret lies in using simple ingredients, precise measurements, and maintaining proper temperatures. Use warm water (around 110°F) to activate the yeast, and avoid over-kneading the dough. This recipe allows you to make delicious bread in just 60 minutes.
Yes, this recipe is quite versatile. You can use oil instead of butter, or water in place of milk. For a whole wheat version, replace white flour with wheat flour, but use slightly less as it’s denser. You can also add herbs, cheese, or dried fruits for flavor variations.
After baking, allow the bread to cool completely before slicing. Store it in an airtight container at room temperature for up to 5 days. For longer storage, you can freeze the bread for up to 3 months. Slicing before freezing makes it easier to thaw individual portions.
While a stand mixer with a dough hook is helpful, it’s not essential. You’ll need basic equipment like mixing bowls, measuring tools, and a baking sheet. A digital scale for precise measurements and an instant-read thermometer for checking water and dough temperatures are also beneficial.
A well-baked loaf should have a golden-brown crust and sound hollow when tapped on the bottom. For enriched doughs containing butter, milk, or eggs, the internal temperature should reach 200°F. If you’re unsure, it’s better to slightly overbake than underbake your bread.


