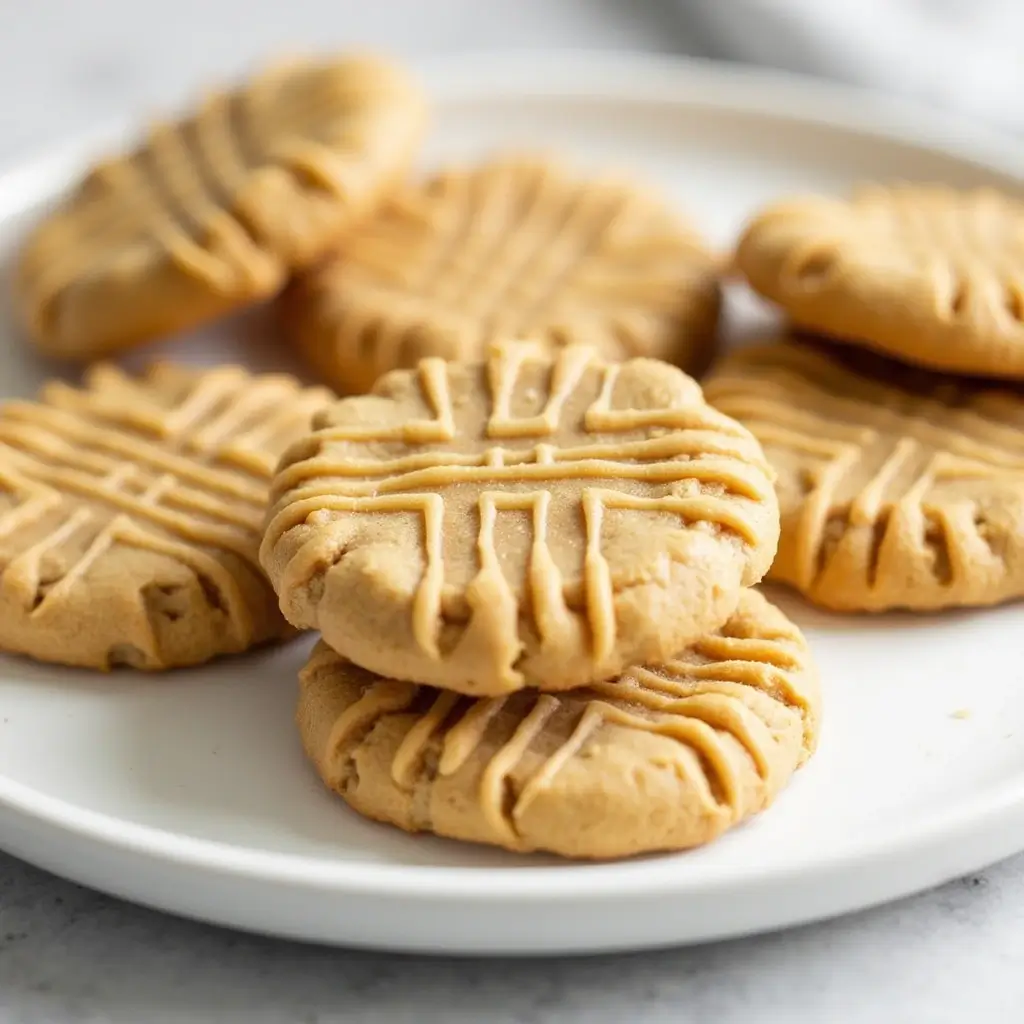
Peanut Butter Microwave Cookies
You know that midnight craving for warm, fresh-baked cookies? These microwave peanut butter cookies will satisfy your sweet tooth in just 5 minutes.
This single-serving cookie delivers comfort and satisfaction without any kitchen hassle. You’ll need just three simple ingredients to create this delicious treat – a tablespoon of peanut butter, brown sugar, and flour. The cooking time is less than a minute.
The recipe’s convenience makes it even more appealing. No need for baking equipment or dealing with full batches of cookies. These microwavable peanut butter cookies pack 227 calories per serving and are a perfect portion-controlled treat that hits the spot.
Let’s take a closer look at this simple recipe that will become your favorite dessert fix!
Before You Get Starte:
Getting ready to make microwave peanut butter cookies starts with a clean workspace. Good preparation will make this quick recipe even easier.
Place all ingredients and measuring tools on your counter. Your peanut butter should be at room temperature to blend better. Take it out 15 minutes early if it’s cold. The microwave-safe dish needs to be completely dry because moisture can change your cookie’s texture.
These preparation steps will give you perfect results:
- Measure ingredients with precision since small changes affect the final texture
- Pick a completely flat microwave-safe plate or dish
- Put parchment paper on your microwave plate
- Make room in your microwave and remove the turntable if needed
- Keep potholders nearby – your dish will be hot
Your microwave should be clean without any food smells that might change your cookie’s taste. The microwave’s wattage is a vital part of cooking time. Start with shorter intervals and adjust as needed.
A tidy workspace throughout the process will help. This simple prep will turn your late-night cookie craving into something delicious in minutes.
Key Tips:
Your success with microwave peanut butter cookies depends on knowing your equipment and timing well. The cooking vessel’s size makes a big difference in how they turn out. You should measure your mug’s capacity by filling it with water and pouring it into a measuring cup.
Getting the timing right is vital for these treats. Here are everything in making them:
- Start with 45 seconds of cooking time
- Add 10-second intervals if needed
- Never exceed 1 minute total cooking time
- Reduce time for wider vessels
- Increase time slightly for deeper containers
The cookie’s texture changes during cooling. You might want to eat it right away, but letting it cool gives you a better consistency. A warm cookie tends to fall apart, in spite of that, a few minutes of cooling helps it keep its shape perfectly.
You can divide the batter into 3-4 smaller ramekins to control portions better. This cuts the cooking time in half and gives you perfect individual servings. Note that microwave-baked cookies won’t have the crispy exterior of oven-baked ones, but they have their own charm with a soft, cake-like texture and gooey center.
A small cup of water next to your cookie in the microwave helps you get consistent results. Steam from the water keeps moisture in and stops your treat from becoming dry or rubbery. Then you’ll get that perfect, soft-baked texture every time.
What Makes This Recipe So Good?
Microwave peanut butter cookies are special because of the way we cook them. The results are quite different from regular oven-baked ones. The microwave uses electromagnetic waves that work with ingredients in a unique way, especially with water molecules. This creates heat as the molecules move around.
These cookies come with some great benefits:
- You can make them in just 5 minutes
- They’re perfect when you want just one or two cookies
- They hit the spot when sugar cravings strike
- The cleanup is super easy
- They use less energy than an oven
The science behind these cookies creates a texture that’s all its own. Your microwave heats food from inside out, which gives you a tender, nutty, and chewy cookie that stays soft. The quick cooking time keeps the moisture locked in and stops the edges from getting bitter like they sometimes do in the oven.
Brown sugar adds a rich taste that works really well with vanilla to boost the peanut butter flavor. The cookies need about 10 minutes to cool – that’s when they get their best texture. To make them even better, try adding a scoop of vanilla ice cream or some fresh whipped cream on top.
The sort of thing I love about this recipe is how easy it is to change things up. You can toss in chocolate chips or chopped nuts to create your own perfect cookie. This quick and simple way to bake makes it fun for kids too. They can see results fast, and you won’t need to watch them too closely.
Why I Love This Recipe:
I bake a lot, and I’ve found that microwave peanut butter cookies are incredibly convenient and satisfying. These treats have become my quick fix when I need something sweet. We made them in under 5 minutes from start to finish.
The best part about this recipe is that it makes just one serving. Each cookie comes out tender and nutty with a chewy texture that hits the spot right away. The cookie tastes even better after cooling for about 10 minutes – a short wait that makes a big difference.
This recipe has become one of my favorites because:
- Perfect portion control for individual servings
- Minimal cleanup required
- No need to heat up the entire kitchen
- Ideal for late-night cravings
- Excellent freezing capability for future use
The recipe is without doubt very adaptable. Chocolate lovers can stir in some chips or add a Hershey’s kiss on top to make a tasty peanut butter blossom cookie. You can try different variations to keep things interesting each time.
These cookies stand out because they turn out great every time. Their tender, slightly soft texture works perfectly with a cold glass of milk. Regular baking needs exact temperatures and timing, but this microwave version gives you great results with very little work
Recipe Variations
These microwave peanut butter cookies can become unique treats with countless possibilities. We loved adding chocolate to create different flavor combinations. You can stir in 2 tablespoons of chocolate chips into the dough or place a Hershey’s kiss on top right after cooking to create a delightful blossom cookie effect.
Almond milk makes a perfect dairy-free substitute and adds a complementary nutty flavor to the peanut butter base. The recipe becomes more exciting with these creative substitutions:
- Texture variations: Use crunchy peanut butter instead of creamy
- Spice additions: Mix in a pinch of cinnamon or nutmeg
- Fruity twist: Add a swirl of jelly for a warm PB&J experience
- Nut alternatives: Replace peanut butter with tahini for a nut-free version
Your cookies taste better with mix-ins like butterscotch chips, oats, or raisins. People with specific dietary needs can substitute regular milk with non-dairy alternatives or swap traditional sweeteners with sugar-free options for equally delicious results.
A scoop of ice cream, whipped cream, or a drizzle of caramel makes perfect toppings for your finished cookie. Chocolate lovers can create a double chocolate treat by replacing one tablespoon of flour with cocoa powder.
Note that these variations keep the quick-cooking charm of the original recipe while offering endless possibilities to customize based on your priorities or dietary needs.

These cookies can be ready in under 5 minutes from start to finish, making them perfect for quick dessert cravings.
Yes, you can easily customize the recipe by adding mix-ins like chocolate chips, nuts, or even swirling in some jelly for a PB&J twist.
The recipe can be adapted for various dietary needs. You can use gluten-free flour, vegan sugar alternatives, and dairy-free milk to make them suitable for vegan or gluten-free diets.
Equipment
Your choice of equipment can make or break your microwave peanut butter cookies. A 6-ounce ramekin gives you the best results when it comes to cooking time and texture. You can also use a 12-ounce standard mug if you want to make bigger portions.
You’ll need these basic tools to bake in your microwave:
- A microwave-safe container (glass, ceramic, or silicone)
- Measuring cups for both dry and liquid ingredients
- Measuring spoons for smaller quantities
- A mixing bowl (microwave-safe preferred)
- Parchment paper to prevent sticking
Heat spreads better in round or oval containers. Your cooking time changes based on your container’s shape – wider containers cook faster, while deeper ones need extra minutes to heat through.
Here’s a quick way to check your mug’s size: fill it with water and pour it into a measuring cup. This helps you adjust your cooking time. Borosilicate glass works best for microwave baking, and ceramic containers give you similar results.
Silicone molds are another great choice because they’re flexible and don’t stick. Using the right measuring tools helps you nail the recipe. You’ll see better results in your cookie’s texture when you use separate measuring cups for dry and liquid ingredients.
Print
Peanut Butter Microwave Cookies
- Total Time: 8 minutes
- Yield: 6 1x
Description
Quick and easy cookies made in the microwave with just a few ingredients! Perfect for satisfying your sweet tooth in minutes.
Ingredients
These microwave peanut butter cookies need exact measurements and quality ingredients to turn out perfect. Let me share what you’ll need to make this quick treat:
Base Ingredients:
- 1 tablespoon unsalted butter, melted
- 1 tablespoon creamy peanut butter
- 1 tablespoon brown sugar
- 1 tablespoon white sugar
- 3 tablespoons all-purpose flour
- 1 pinch salt
Optional Enhancements:
- 1 teaspoon vanilla extract
- 1 teaspoon whole milk
- 1/4 teaspoon baking powder
Instructions
These delightful treats need perfect timing and careful attention. Let me walk you through each step of the process.
Preparation:
Mix melted butter and peanut butter in a microwave-safe container. The mixture needs 30 seconds of heating until it melts completely. Stir it until you get a smooth consistency. The next step is to add brown sugar, white sugar, and salt to your butter mixture and stir until everything blends together.
Your original whisking of wet ingredients should be vigorous to keep the final cookie from becoming grainy. Make sure all sugar crystals dissolve during this process. The flour mixture should be folded in until you have a soft, slightly sticky dough.
Cooking:
Put your prepared dough in a microwave-safe container. A classic peanut butter cookie’s signature look comes from making a crisscross pattern on top with a fork.
Your microwave’s power determines the cooking time:
- The first round needs 45 seconds at full power
- The top should look set when it’s done
- Add more time in 5-10 second bursts if needed, but this is a big deal as it means that 1 minute total
Perfect cookies might look slightly underdone at the edges. The cookie needs to cool for 10 minutes. A chocolate kiss should go on right after cooking while the cookie is still hot.
The cookie gets firmer as it cools down. You’ll get the best results by waiting until it’s completely cool before handling it, since the texture keeps developing during this time.
Notes
Microwave power variations play a significant part in making perfect treats. Your microwave’s wattage determines the cooking times. A 700-watt microwave needs 50 seconds to achieve optimal results.
Storage Considerations: These cookies taste best when fresh, but you might want to save them for later. Room temperature storage works well if you wrap them in foil and eat them within a day.
These cookies adapt well to many dietary needs. Here’s how to make them vegan:
- Replace regular flour with gluten-free alternatives
- Substitute traditional sugar with vegan options
- Use dairy-free milk
- Choose vegan chocolate chips for mix-ins
Microwave cookies’ texture is different from their oven-baked counterparts. You should expect a softer, more cake-like consistency instead of crispy edges. Let your cookie cool completely to prevent crumbling and achieve the perfect texture.
Size Adjustments: You can control portion size and cooking time by dividing the batter into smaller ramekins. This method cuts cooking time in half. Larger portions need double the ingredients, but you must cook each cookie separately.
Power Settings: Start with shorter cooking intervals and adjust based on your microwave’s strength. Important: Check if the cookie is done after the original cooking time, then add more time in small increments if needed.
- Prep Time: 5 minutes
- Cook Time: 3 minutes


