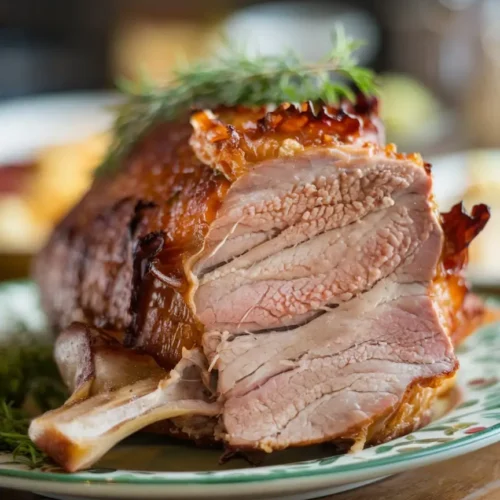
Roast Pork with Crackling:
A succulent roast pork dish featuring juicy meat and perfectly crispy, golden crackling, ideal for a special family meal.
Equipment
- A sturdy roasting pan with fixed handles and 3-inch high sides
- A reliable meat thermometer (preferably thin-stemmed instant-read)
- Heavy-duty rimmed baking sheets
- A wire rack that fits inside your roasting pan
- Kitchen twine for trussing
- Sharp knife for scoring the skin
Ingredients
For the roast pork:
- 2.2 - 2.5 kg boneless pork shoulder joint
- 2 cloves minced garlic
- 1 teaspoon fresh thyme leaves or ½ teaspoon dried thyme
- 1 tablespoon fresh parsley finely chopped (or ½ teaspoon dried parsley)
- ¼ teaspoon black pepper
- 1 tablespoon sea salt
For the gravy:
- Meat juices from your roasted pork
- 3 crumbled chicken stock cubes
- 720 ml 3 cups hot vegetable stock
- ¼ teaspoon each of salt and black pepper
- 2 tablespoons cornflour mixed with 5 tablespoons cold water
- ¼ teaspoon gravy browning optional
Instructions
- Here’s my proven method to make perfect roast pork with amazing crackling. Let me share exactly how I do it:1 - I start by heating my oven to 220°C. The first step is pouring boiling water over the scored pork skin while it sits on a plate in the sink. This helps the score marks open up nicely.2 - I dry the skin completely with paper towels and put the pork on a baking tray that has medium-high sides. The tray’s height is vital since the pork releases quite a bit of liquid fat as it cooks.3 - Salt gets rubbed really well into the skin, especially into all those score marks. The pork goes on the top shelf of my oven to cook for 20-30 minutes.I usually check how it’s browning around the 20-minute mark. 4 - The temperature needs adjusting up or down based on how the color develops.My experience shows these visual signs mean it’s cooking perfectly: - A beautiful golden color everywhere. - The skin bubbles up evenly. - You can clearly see the score marks.The pork needs to rest for 15-20 minutes before I start carving. You can’t skip this resting time if you want juicy meat. A loose foil cover keeps everything warm, and amazingly, the crackling stays crispy even after several hours.Pro tip: Sometimes parts of the skin crisp up faster than others. I fix this by using small foil patches held in place with toothpicks while the rest catches up.
Notes
Everything I’ve learned about making roast pork with crackling has helped me perfect this dish. We found that there was a need to use a good thermometer and with good reason too – you can use a simple instant-read type or a digital probe thermometer that stays in the meat.
Quality matters when choosing pork. Higher-end cuts make better crackling since cheaper ones often contain added water. This creates steam under the skin and makes the crackling tough and chewy. My experience shows that a rolled boneless shoulder joint with good fat layering gives the most succulent results.
These troubleshooting tips will help you achieve perfect crackling:
- The crackling needs more crispiness? Just turn up the heat for 10-15 minutes
- Make sure the skin is completely dry before cooking
- Add all the salt specified – this helps the crackling puff up properly
- Score the skin well or let your butcher handle it